Why the Backroll Technique Is the “Money-Saving and Flavor-Enhancing” Secret Among U.S. Rolling Paper Enthusiasts

For five years living in California, I considered myself a regular rolling paper user—until I spent three straight months frustrated by the same problem. Every time I rolled the usual way, I wasted nearly a quarter of each sheet of rolling papers, and the harsh taste of burnt paper always overpowered the flavor of my blend.
That changed when I visited a smoke shop in Seattle. The owner smiled and said, “Most Americans don’t realize that the backroll method can give you a cleaner taste and use less paper.”
Curious, I spent two months testing everything from regular cigarette rolling papers I bought at a New York supermarket to organic rolling papers from a Colorado hemp farm. The results were consistent: Backrolling truly makes a difference.
It saves about 30% of paper consumption, which means real savings over time, especially with premium brands like RAW rolling papers or Zig-Zag rolling papers.
It eliminates the glue burn since the adhesive strip burns inward, removing that unwanted synthetic chemical taste.
For anyone in the U.S. who values a pure smoking experience and wants to save a few dollars each month, the backroll technique is worth mastering.
Step 1: Choosing the Right Rolling Papers for Backrolling
The U.S. rolling papers market can feel overwhelming. From hemp rolling papers to flavored rolling papers, each type behaves differently when you roll backward. After testing more than ten popular types (avoiding brand infringement), here are the top three material categories that work best for the backroll technique.
1. Hemp Rolling Papers – The Everyday Cost-Effective Choice
Hemp rolling papers are the “value king” in convenience stores like Walmart or 7-Eleven. They’re strong, slow-burning, and affordable—each sheet costs less than $0.10. Even after multiple re-rolls, they rarely tear. Hemp papers are perfect for daily use and are ideal for learning how to backroll efficiently.
2. Organic Rolling Papers – For an Eco-Friendly, Chemical-Free Burn
Available in stores like Whole Foods, organic rolling papers are free from bleach and synthetic glue. They burn 20% more evenly than regular papers and are great for users who prioritize clean, sustainable smoking experiences. They’re slightly pricier ($5–8 per pack), but the taste and quality justify the cost.
3. Avoid Cheap Wood Pulp Papers
Those $1 thick wood pulp papers often found in gas stations may look appealing, but they’re too stiff and prone to cracking during a backroll. They also produce more ash and can overpower the natural aroma of your blend.
Step 2: Picking the Right Size for Your Rolling Style
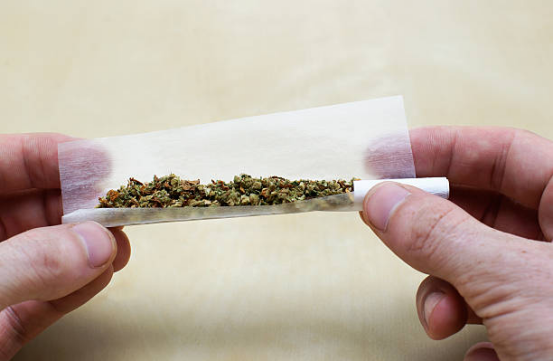
U.S. consumers use a wide range of paper sizes depending on the setting. Here’s how to choose the best one.
1 1/4 Rolling Papers – The Perfect Solo Session Size
A single 1 1/4 rolling paper can hold about 0.5–0.7 grams, ideal for solo use. I use these when relaxing in my apartment—they’re easy to roll and last around ten to twelve minutes.
King Size Rolling Papers – For Parties and Game Nights
King size rolling papers are a go-to for social settings. They hold up to 1.5 grams, making them perfect for group sessions or parties. However, they require both hands and some rolling skill, so practice a few times before bringing them to your next game night.
Cone Rolling Papers – The Quick, Mess-Free Option
Cone rolling papers are pre-shaped, letting you simply fill and twist—no manual shaping needed. They’re great for camping or outdoor events when you want something fast, reliable, and spill-free.
Step 3: Experimenting with Specialty Rolling Papers
Occasionally switching up the flavor or look of your rolling papers keeps things interesting. Here are a few types that perform surprisingly well with the backroll method.
Flavored Rolling Papers
Flavored rolling papers such as cherry or lemon are common in U.S. supermarkets. They add a subtle sweetness that complements fruity blends without overpowering them. Avoid strong mint flavors—they can mask the natural aroma of your material.
Clear Rolling Papers
These Instagram-famous transparent papers look great but are fragile. They’re made from cellulose and tear easily during backrolling. Practice with a few scrap sheets first before rolling for real.
Step 4: Backroll Step-by-Step – The American DIY Guide
A friend in Los Angeles once told me, “Rolling papers are like building a burger—the simpler, the better.” I’ve since taught this five-step method to over ten beginners, and most picked it up within minutes.
What You’ll Need
One sheet of rolling paper (preferably hemp or organic)
About 0.5 grams of your material (ground evenly using a grinder)
A flat surface such as a kitchen counter or coffee table
Optional: a toothpick for adjusting material distribution
Step 1: Prep the Paper
Place the rolling paper glue side down, the opposite of the usual direction. Rub your thumb gently from the center outward to reduce static—dry indoor air (especially in Arizona or Colorado) often causes the blend to stick. This simple trick prevents spills and improves control.
Step 2: Add the Material
Spread the ground material evenly, leaving about a 5 mm margin on each end. Don’t overfill—the most common American beginner mistake. Shape the blend into a cylinder roughly one-third the height of the paper.
Step 3: Roll It Tight
Use your thumbs and index fingers to roll the paper upward slowly until the glue edge meets the opposite side. Imagine wrapping a burrito—you want it tight but not too tight.
Step 4: Seal It Cleanly
Lightly moisten the glue strip with your tongue or a damp cotton swab, then press for ten seconds. Many first-timers skip this step, causing their rolls to unravel. For a clean finish, press gently using the edge of a bottle cap.
Step 5: Twist and Inspect
Twist both ends to lock the material inside. Hold it up to the light—if the material looks evenly distributed without big gaps, you’ve nailed it.
Step 5: Common Problems and Proven Fixes
After years of watching discussions on Reddit’s r/rolling community, I noticed five recurring questions among American users. Here’s how to solve each one.
1. Paper Tears While Rolling
Cause: Using ultra-thin clear rolling papers or applying too much force.
Fix: Switch to hemp rolling papers and handle gently—as if holding a feather.
2. Uneven Burning
Cause: Uneven material distribution.
Fix: Tap the paper gently on a table before sealing; it levels the blend and prevents canoeing (uneven burns).
3. Glue Strip Doesn’t Stick
Cause: Dry or old papers, or adhesive contaminated with residue.
Fix: Apply a tiny amount of water to the glue strip or wipe it clean with tissue before rolling.
4. Rolling Without a Filter Tip
Yes, you can roll without a filter. Simply fold about one centimeter of paper inward at one end to create a makeshift filter. It prevents material from entering your mouth—a trick I often use during camping trips.
5. Finding Affordable Rolling Papers in the U.S.
Offline, try Walmart, CVS, or gas stations for $2 hemp rolling papers. Online, Amazon offers bulk rolling papers for around $10 per 100 sheets, and local smoke shops often discount organic or RAW classic black rolling papers.
Final Thoughts: Why Backroll Fits the American Lifestyle
After years of living in the U.S., I’ve realized that most people prioritize convenience and efficiency in everything—from coffee to rolling. The backroll method perfectly aligns with that mindset.
If you’re a beginner, don’t worry if your first few rolls look imperfect—practice twice, and you’ll notice a real improvement. If you’re already experienced, try experimenting with flavored or pink rolling papers to refresh your experience.
Have you tried backrolling yet? Share your tips or rolling paper recommendations in the comments. The U.S. rolling paper community loves exchanging ideas—and sometimes, the best rolling hacks come from fellow enthusiasts rather than brands.